
The goal is to create a prototype real-time strategy game inspired by Command School from Ender’s Game, where two players act as fleet commanders. Each player directs fleets of assets in battle by speaking in real time to subcommanders, implemented as LLMs, who coordinate sub-fleets.
We’ll build this in many steps, with this first post focusing on the voice-to-game interaction. We’ll start with hello-world examples for each individual component of the architecture, combine those components, and then increase the complexity to try and match the final prototype. The glue connecting these components will be the Model Context Protocol (MCP), a recent development in the world of agentic LLMs.
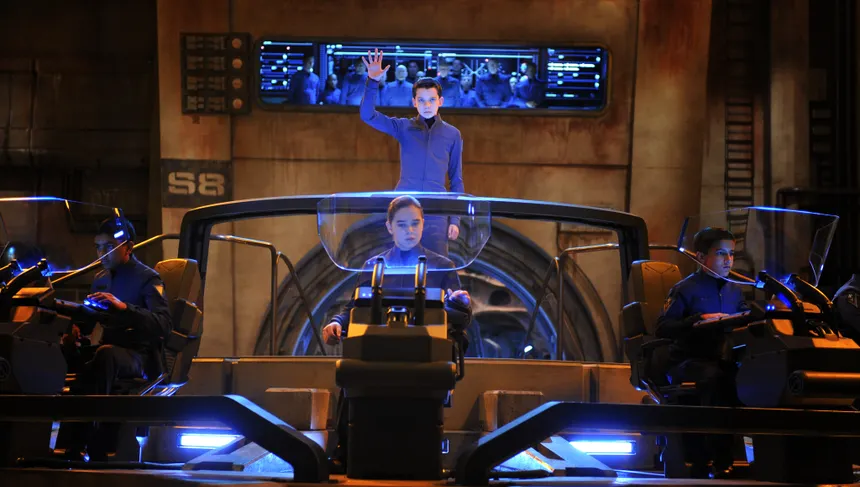
Here is what we will have by the end of this post.
The overall architecture for how users interact with the game will be as follows: the player holds down a button to speak a command, which gets transcribed using a voice-to-text model. The transcription is sent to an LLM agent connected to an MCP server. That server controls the simulation, meaning the agent can directly interact with the simulation using any available tools implemented on the server.

One neat aspect of this architecture is that the voice-controlled agent is independent of the application running on the MCP server. This means we can reuse the voice-controlled agent for any MCP-compatible application. In fact, we’ll develop the voice-controlled agent only once and then use it to interact with multiple MCP servers on our way to the Command School protoype.
Hello World
We start by ensuring we can implement each component as a standalone script in its most simple form.
Voice-to-Text
OpenAI’s Whisper model can run locally on a CPU, is fast, and fairly accurate. We’ll use it for the transcription.
When the player hits the spacebar, recording starts. When they let go, recording stops, and we call model.transcribe(audio).
1
2
3
4
5
6
7
8
9
10
11
12
13
14
15
16
17
18
19
20
21
22
23
24
25
26
27
28
29
30
31
32
33
34
35
36
37
38
39
40
41
42
43
44
45
46
47
48
49
50
51
52
53
54
55
56
57
58
59
60
61
62
63
64
import whisper
import sounddevice as sd
import numpy as np
import scipy.io.wavfile as wav
from pynput import keyboard
import tempfile

# Load Whisper model (choose "tiny" or "base" for CPU)
model = whisper.load_model("base")

# Audio config
SAMPLE_RATE = 16000
CHANNELS = 1

recording = False
audio = []


def audio_callback(indata, frames, time, status):
    if recording:
        audio.append(indata.copy())


def start_recording():
    global recording, audio
    recording = True
    audio = []
    print("🎙️  Listening...")


def stop_recording_and_transcribe():
    global recording, audio
    recording = False
    print("🛑  Recording stopped. Transcribing...")

    # Flatten and save to WAV
    audio_np = np.concatenate(audio, axis=0)
    with tempfile.NamedTemporaryFile(suffix=".wav", delete=False) as tmpfile:
        wav.write(tmpfile.name, SAMPLE_RATE, (audio_np * 32767).astype(np.int16))
        result = model.transcribe(tmpfile.name)
        print(f"📝 Transcription: {result['text']}\n")


# Keyboard handling
def on_press(key):
    if key == keyboard.Key.space and not recording:
        start_recording()


def on_release(key):
    if key == keyboard.Key.space and recording:
        stop_recording_and_transcribe()


# Start audio stream
stream = sd.InputStream(
    samplerate=SAMPLE_RATE, channels=CHANNELS, callback=audio_callback
)
stream.start()

# Keyboard listener
print("Press and hold [SPACE] to speak a command. Release to transcribe.")
with keyboard.Listener(on_press=on_press, on_release=on_release) as listener:
    listener.join()
MCP Server
For our hello-world MCP server, we’ll start as simple as possible. We’ll store a counter and provide two functions: reading the counter and incrementing the counter. Conceptually, this counter is our “game”, which has a state that the agent can read, and a interface that allows the agent to influence the state.
We’ll use the MCP Python SDK, which allows us to wrap standard Python functions with a decorator to convert them into MCP “tools”—functions that agents can call. The decorator will extract the function signature and docstring automatically.
1
2
3
4
5
6
7
8
9
10
11
12
13
14
15
16
17
18
19
20
21
22
23
24
from mcp.server.fastmcp import FastMCP

# Create an MCP server
mcp = FastMCP("Counter Demo")

counter = 0


@mcp.tool()
def add_to_counter(amount: int) -> int:
    """Add a value to the counter and return the new value."""
    global counter
    counter += amount
    return counter


@mcp.tool()
def get_counter_value() -> int:
    """Get the current value of the counter."""
    return counter


if __name__ == "__main__":
    mcp.run(transport="sse")
Next, we test whether the MCP server works. The MCP CLI provides a development tool that lets us interact with the server in a browser. This mirrors what the LLM agent will see, except the agent gets a JSON file rather than a GUI.
1
mcp dev counter-mcp-server.py
Once we verify the server can work, we run it in non-development mode.
1
python counter-mcp-server.py
In the next section I’ll be using a third-party provider to run the agent (I don’t have a GPU), which means we need to expose our local MCP server to the rest of the world, allowing it to be accessed from the providers server. You could use port forwarding, but I prefer localtunnel, which graciously provides free public endpoints that let us tunnel our local processes to the external world.
1
lt --port 8000
This gives a public URL that the remote agent can access.
LLM Agent
Since MCP is new (as of this writing), very few providers support it. OpenAI does, so we’ll use their API. You’ll need a few dollars’ worth of credits and an API key.
We’ll write a script to create an agent that connects to our MCP server and can run its tools. The agent will receive prompts, execute the appropriate tools, and summarize its steps. I think that the agent might perform better if it first planed, then acted, but the OpenAI API doesn’t easily allow for this, so we’ll go with the simplest working version for now.
1
2
3
4
5
6
7
8
9
10
11
12
13
14
15
16
17
18
19
20
21
22
23
24
25
26
27
28
29
30
31
32
33
34
35
36
37
38
39
40
41
42
43
44
45
46
47
48
49
50
51
import argparse
import asyncio
from agents import Agent, Runner, gen_trace_id, trace
from agents.mcp import MCPServer, MCPServerSse


async def run(mcp_server: MCPServer):
    agent = Agent(
        name="Assistant",
        instructions="Use the tools to execute the command, then provide a summary of all the steps you took.",
        mcp_servers=[mcp_server],
    )

    # Turn natural language into an MCP command
    message = "Add 10 to the counter."
    print(f"Running: {message}")
    result = await Runner.run(starting_agent=agent, input=message)
    print(result.final_output)

    # Use some reasoning to modify the counter
    message = "Add whatever is necessary to get the counter to 40."
    print(f"Running: {message}")
    result = await Runner.run(starting_agent=agent, input=message)
    print(result.final_output)


async def main():
    parser = argparse.ArgumentParser()
    parser.add_argument(
        "--mcp-url",
        required=True,
        help="Base URL for the MCP server (without /sse)",
    )
    args = parser.parse_args()

    async with MCPServerSse(
        name="SSE Custom Server",
        params={
            "url": args.mcp_url + "/sse",
        },
    ) as server:
        trace_id = gen_trace_id()
        with trace(workflow_name="SSE Example", trace_id=trace_id):
            print(
                f"View trace: https://platform.openai.com/traces/trace?trace_id={trace_id}\n"
            )
            await run(server)


if __name__ == "__main__":
    asyncio.run(main())
Once we run this script and provide the public URL to the MCP server, the agent will be able to update the counter. OpenAI also provides a trace so we can view the agent’s tool usage.
Combining Transcription and Agents
Now we connect the transcription so it feeds directly into the agent as a prompt. We have to be a little careful to ensure that the user can transcribe multiple recordings even if the transcription or agent is still processing a previous recording.
1
2
3
4
5
6
7
8
9
10
11
12
13
14
15
16
17
18
19
20
21
22
23
24
25
26
27
28
29
30
31
32
33
34
35
36
37
38
39
40
41
42
43
44
45
46
47
48
49
50
51
52
53
54
55
56
57
58
59
60
61
62
63
64
65
66
67
68
69
70
71
72
73
74
75
76
77
78
79
80
81
82
83
84
85
86
87
88
89
90
91
92
93
94
95
96
97
98
99
100
101
102
103
104
105
106
107
108
109
110
111
112
113
114
115
116
117
118
119
120
121
122
123
124
125
126
127
128
129
130
131
132
133
134
135
136
137
138
139
140
141
142
143
import whisper
import sounddevice as sd
import numpy as np
import scipy.io.wavfile as wav
from pynput import keyboard
import tempfile
import threading
import queue
import asyncio
import argparse
from agents import Agent, Runner
from agents.mcp import MCPServerSse
from agents.model_settings import ModelSettings

print("[INFO] Loading Whisper model...")
model = whisper.load_model("base")
print("[INFO] Whisper model loaded.")
SAMPLE_RATE = 16000
CHANNELS = 1
recording = False
audio = []

audio_id_counter = 0  # Counter for audio segments

audio_queue = queue.Queue()  # For audio to be transcribed
transcription_queue = asyncio.Queue()  # For transcribed text to be processed by agent

ready_event = threading.Event()  # Event to signal when the agent is ready


# Recording and audio queueing
def audio_callback(indata, frames, time, status):
    if recording:
        audio.append(indata.copy())


def start_recording():
    global recording, audio
    recording = True
    audio = []
    print("🎙️  Listening...")


def stop_recording_and_queue():
    global recording, audio, audio_id_counter
    recording = False
    print("🛑  Recording stopped. Queuing for transcription...")
    audio_np = np.concatenate(audio, axis=0)
    audio_queue.put((audio_np, audio_id_counter))
    audio_id_counter += 1


def on_press(key):
    if key == keyboard.Key.space and not recording:
        start_recording()


def on_release(key):
    if key == keyboard.Key.space and recording:
        stop_recording_and_queue()


# Transcription worker (thread)
def transcribe_worker():
    while True:
        audio_np, audio_id = audio_queue.get()
        print(f"📝 Transcribing audio file {audio_id}\n")
        with tempfile.NamedTemporaryFile(suffix=".wav", delete=False) as tmpfile:
            wav.write(tmpfile.name, SAMPLE_RATE, (audio_np * 32767).astype(np.int16))
            result = model.transcribe(tmpfile.name)
            print(f"📝 Transcription: {result['text']}\n")
            # Put transcription into the async queue for the agent
            asyncio.run_coroutine_threadsafe(
                transcription_queue.put(result["text"]), agent_loop
            )
        audio_queue.task_done()


# Agent worker (async)
async def agent_worker(agent):
    print("[INFO] Agent is ready and waiting for transcriptions...")
    ready_event.set()  # Signal that agent is ready
    while True:
        prompt = await transcription_queue.get()
        print(f"🤖 Running agent with input: {prompt}")
        result = await Runner.run(starting_agent=agent, input=prompt)
        print(f"🤖 Agent output: {result.final_output}\n")
        transcription_queue.task_done()


# Main async entry point
async def main():
    parser = argparse.ArgumentParser()
    parser.add_argument(
        "--mcp-url",
        required=True,
        help="Base URL for the MCP server (without /sse)",
    )
    args = parser.parse_args()
    mcp_url = args.mcp_url
    print("[INFO] Loading agent and connecting to MCP server...")
    async with MCPServerSse(
        name="SSE Custom Server",
        params={"url": mcp_url + "/sse"},
        client_session_timeout_seconds=60 * 10,
    ) as server:
        agent = Agent(
            name="Assistant",
            instructions="Use the tools to execute the command, then provide a summary of all the steps you took.",
            mcp_servers=[server],
            model_settings=ModelSettings(tool_choice="required"),
        )
        print("[INFO] Agent loaded and connected to MCP server.")
        await agent_worker(agent)


# Start the agent event loop in a background thread
def start_agent_loop():
    global agent_loop
    agent_loop = asyncio.new_event_loop()
    asyncio.set_event_loop(agent_loop)
    agent_loop.run_until_complete(main())


if __name__ == "__main__":
    # Start agent loop in background thread
    agent_loop = None
    threading.Thread(target=start_agent_loop, daemon=True).start()
    # Start transcription worker thread
    threading.Thread(target=transcribe_worker, daemon=True).start()
    # Start audio stream in main thread
    stream = sd.InputStream(
        samplerate=SAMPLE_RATE, channels=CHANNELS, callback=audio_callback
    )
    stream.start()
    # Wait until agent is ready before starting keyboard listener and printing prompt
    ready_event.wait()
    print("[INFO] Whisper model and agent are ready.")
    print(
        "Press and hold [SPACE] to speak a command. Release to queue for transcription and send to agent."
    )
    with keyboard.Listener(on_press=on_press, on_release=on_release) as listener:
        listener.join()
Something neat is that this script doesn’t assume anything about the MCP server, so we can change the server without changing anything here.
So let’s make a more complex MCP server.
Canvas MCP Server
Here’s a more interesting MCP server: what if we could control a canvas of shapes using our voice? We’ll show a visual canvas with shapes the agent can manipulate using the following tools:
create_circlecreate_squaremove_shapesremove_shapesget_canvas
It’s essential to write good documentation for each tool, as this is what the agent will reference when choosing an action to take. I found that including example inputs, expected ranges, and typical values can help to improve its performance.
1
2
3
4
5
6
7
8
9
10
11
12
13
14
15
16
17
18
19
20
21
22
23
24
25
26
27
28
29
30
31
32
33
34
35
36
37
38
39
40
41
42
43
44
45
46
47
48
49
50
51
52
53
54
55
56
57
58
59
60
61
62
63
64
65
66
67
68
69
70
71
72
73
74
75
76
77
78
79
80
81
82
83
84
85
86
87
88
89
90
91
92
93
94
95
96
97
98
99
100
101
102
103
104
105
106
107
108
109
110
111
112
113
114
115
116
117
118
119
120
121
122
123
124
125
126
127
128
129
130
131
132
133
134
135
136
137
138
139
140
141
142
143
144
145
146
147
148
149
150
151
from mcp.server.fastmcp import FastMCP
import threading
import tkinter as tk
import uuid


# Data structure for shapes
def make_shape(shape_type, x, y, size, color):
    return {
        "id": str(uuid.uuid4()),
        "type": shape_type,
        "x": x,
        "y": y,
        "size": size,
        "color": color,
    }


shapes = []
canvas_callbacks = []


# Tkinter GUI for live canvas
def start_canvas_gui():
    root = tk.Tk()
    root.title("MCP Canvas")
    canvas = tk.Canvas(root, width=600, height=400, bg="white")
    canvas.pack()

    def redraw():
        canvas.delete("all")
        for shape in shapes:
            if shape["type"] == "circle":
                x, y, r = shape["x"], shape["y"], shape["size"]
                canvas.create_oval(x - r, y - r, x + r, y + r, fill=shape["color"])
            elif shape["type"] == "square":
                x, y, s = shape["x"], shape["y"], shape["size"]
                canvas.create_rectangle(
                    x - s // 2, y - s // 2, x + s // 2, y + s // 2, fill=shape["color"]
                )
        canvas.after(100, redraw)

    canvas.after(100, redraw)
    root.mainloop()


# Start the GUI in a background thread
gui_thread = threading.Thread(target=start_canvas_gui, daemon=True)
gui_thread.start()

mcp = FastMCP("Canvas Demo")


@mcp.tool()
def create_circle(x: int, y: int, radius: int, color: str) -> str:
    """
    Create a circle on the canvas.

    Args:
        x (int): X position of the center in pixels (0-600, left to right).
        y (int): Y position of the center in pixels (0-400, top to bottom).
        radius (int): Radius of the circle in pixels (suggested: 10-100).
        color (str): Fill color (e.g., red, blue, green, yellow, black, white, or any Tkinter color string).

    Returns:
        str: The unique ID of the created circle.
    """
    shape = make_shape("circle", x, y, radius, color)
    shapes.append(shape)
    return shape["id"]


@mcp.tool()
def create_square(x: int, y: int, size: int, color: str) -> str:
    """
    Create a square on the canvas.

    Args:
        x (int): X position of the center in pixels (0-600, left to right).
        y (int): Y position of the center in pixels (0-400, top to bottom).
        size (int): Side length of the square in pixels (suggested: 10-100).
        color (str): Fill color (e.g., red, blue, green, yellow, black, white, or any Tkinter color string).

    Returns:
        str: The unique ID of the created square.
    """
    shape = make_shape("square", x, y, size, color)
    shapes.append(shape)
    return shape["id"]


@mcp.tool()
def move_shapes(new_shape_positions: list) -> bool:
    """
    Move one or more shapes to new positions.

    Args:
        new_shape_positions (list): A list of dicts with shape IDs and new positions.
            Each dict should have keys: 'id', 'x', 'y'.

    Returns:
        bool: True if all shapes were found and moved, False if any shape was not found.
    """
    all_moved = True
    for new_shape_position in new_shape_positions:
        shape_found = False
        for shape in shapes:
            if shape["id"] == new_shape_position["id"]:
                shape["x"] = new_shape_position["x"]
                shape["y"] = new_shape_position["y"]
                shape_found = True
        if not shape_found:
            all_moved = False
    return all_moved


@mcp.tool()
def remove_shapes(shape_ids: list) -> bool:
    """
    Remove one or more shapes from the canvas.

    Args:
        shape_ids (list): A list of unique shape IDs to remove.

    Returns:
        bool: True if all shapes were found and removed, False if any shape was not found.
    """
    initial_count = len(shapes)
    shapes = [shape for shape in shapes if shape["id"] not in shape_ids]
    return len(shapes) < initial_count


@mcp.tool()
def get_canvas() -> list:
    """
    Get the current state of the canvas.

    Returns:
        list: A list of all shapes on the canvas. Each shape is a dict with keys:
            - id (str): Unique shape ID
            - type (str): 'circle' or 'square'
            - x (int): X position (pixels)
            - y (int): Y position (pixels)
            - size (int): Radius (for circles) or side length (for squares)
            - color (str): Fill color
    """
    return shapes


if __name__ == "__main__":
    mcp.run(transport="sse")
After running the server (python canvas-mcp-server.py) and exposing it (lt --port 8000), we can use our voice-controlled agent (python voice-controlled-agent.py --mcp-url url_generated_by_lt) to interact with the canvas.
The agent can make dumb mistakes, but it can also sometimes be surprisingly clever. One funny interaction I had: Everything seemed to be working correctly, but then I noticed I had forgotten to implement the remove_shapes function. This was weird since the agent seemed to be removing shapes when I asked. It turns out that when the agent couldn’t find a tool to remove the shapes, it would decide to move the shapes off the side of the screen so I couldn’t see them anymore, which made it look like the non-existent remove_shapes function was working just fine.
Next Steps
We can see how easy it is to connect a voice-controlled agent to an MCP server, and how general the MCP server can be. We have made a server that was just a counter, a server that was a canvas we could draw shapes on, and next we will begin building the MCP server that can be the Command School game.
All the code seen in this post can also be found on GitHub.